
I've never made a classic fruit tart or anything like that but I decided rather than go the traditional route, I'd break in my new tart pans with something fun and experimental.... chocolate chip cookie tarts! It's basically a tart but the crust is chocolate chip cookie and the filling is no-bake nutella cheesecake (a recipe I found on Pinterest from the MyBakingAddiction blog). The filling options for this recipe are endless, though... you could try different flavors of cheesecake, pudding, mousse, even ice cream! Anyway, here's how I made it:

I started with the Nestle Tollhouse cookie recipe on the bag of chocolate chips (that's the one my family always uses, though we usually add butterscotch chips on top of the chocolate chips in the recipe). After I finished the dough I put it in the fridge for about an hour so it would firm up enough that I could mold it into the tart pans. In the first batch of four tarts I sprayed the pans first but the bottoms ended up being pretty moist so I omitted that step in the second set. To mold the cookie crust I just put a ball of dough in the center of the pan (about 3 heaping tablespoons) and spread it out with my fingers. If you find that the dough is sticking to your fingers, try spraying your hands with cooking spray first or put the dough in the fridge for another 20 minutes.

The above picture shows the cookie crust in four different stages from start to finish. The one on the right shows the approximate amount of dough I used for each pan and the second one from the right shows the dough spread out on the bottom of the pan. In the third pan you an see that I added some extra cookie dough to the sides of the pan and pressed it into the indentations. I started by adding pinches of cookie dough but then realized it would be quicker to just roll out a small cylinder of cookie dough (like you would with clay or playdough) and press it into the sides of the pan. In the final pan on the far left you can see that the dough just fills the pan and it's packed down to about 1/2 inch in thickness. Once I had four pans filled (the package only contained 4 pans) I popped them in the oven at 375 for 10 minutes.

After ten minutes the two tarts in the back of the pan had browned but the ones up front needed a little more time so I rotated the pan and put them back in for another 3 minutes or so. For the second batch of tarts I split the baking time, rotating the pan after 6 minutes and checked them after another 6. I ended up baking the second batch for a total of 14 minutes but they probably could have gone another 2 minutes or so. When I first took the tarts out of the oven I was a little concerned because they puffed up just like a normal cookie would, losing the "tart" shape with the indentation in the middle. As you can see in the picture, though, they settled as they cooled. I even went so far as to pat down the middles using the flats of my fingers just after taking them out of the oven to be sure the centers sank like I wanted them to.
I let the tarts cool for a few minutes in the pans then removed them and set them on a large cutting board to cool. After 20 minutes or so I then turned them upside down and supported the middles with a piece of balled-up paper towel so the moist bottoms of the tarts could crust over a little bit. While the tarts were cooling, I prepared the no-bake cheesecake filling I mentioned earlier. Feel free to experiment a bit with your own filling to see what works. After I'd finished the cheesecake filling I put it in a Ziploc freezer bag and tossed it in the fridge.

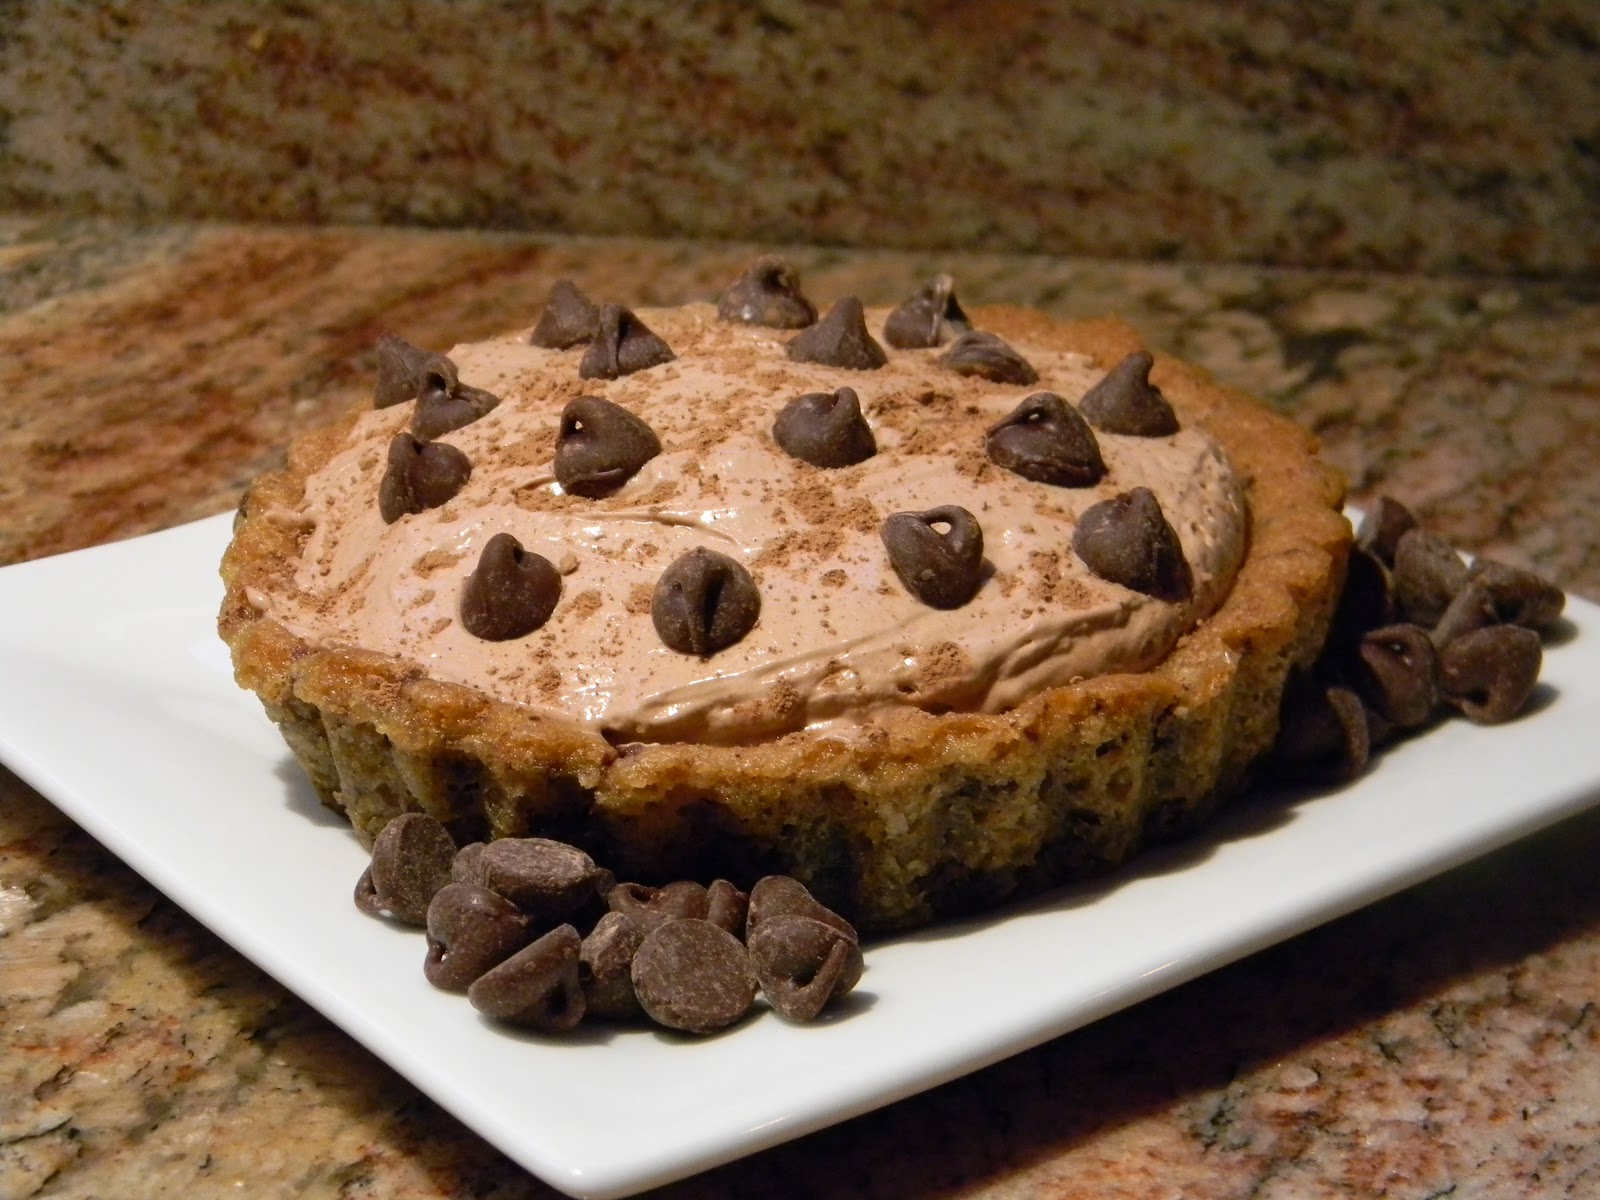
The final step in this experiment was to actually fill the tarts once they'd cooled sufficiently. I took the bag of cheesecake out of the fridge and snipped the end off it then piped the cheesecake into the tart crusts with a swirl pattern. You could also just spoon the filling into the tart crusts if you want or pipe a dollop of cheesecake in the center and spread it with the back of a spoon. For the sake of making a pretty picture, I then sprinkled some Nestle cocoa powder on top and added a few extra chocolate chips just for good measure. Depending what filling you use, you could decorate your tarts with fresh whipped cream, sprinkles or some ripe berries.
Here's the recipe!
Ingredients for Nestle Tollhouse Chocolate Chip Cookies:
2 1/4 cups all-purpose flour
3/4 cups granulated sugar
3/4 cups packed brown sugar
3/4 cups packed brown sugar
2 sticks unsalted butter, softened
1 tsp baking soda
1 tsp salt
2 large eggs
2 cups chocolate chips
Instructions:
- Preheat the oven to 375°F.
- Cream together the butter, sugars and vanilla on medium-high speed until light and fluffy, about 2 minutes.
- Add the eggs, one at a time, beating well after each addition.
- Combine the flour, baking soda and salt in a small bowl. Add the flour mixture to the butter mixture in small batches, stirring on low speed to combine. Scrape down the sides of the bowl as needed.
- Fold in the chocolate chips. Cover the mixing bowl and place it in the refrigerator for about an hour.
- Scoop out about 3 tablespoons of cookie dough and place it in the center of each tart pan. Use your fingers to spread the dough evenly along the bottom of the pan, pressing it into the sides.
- Add more cookie dough as needed to cover the sides of the pan, keeping the thickness as even as possible (between 1/4 and 1/2 inch).
- Place the tart pans on a cookie sheet and bake at 375°F for 12 to 15 minutes, rotating the pan halfway through the baking time. The tarts should puff up and be uniformly browned on top when finished.
- Remove the tarts from the oven and place them, in the pans, on a wire cooling rack for 10 minutes.
- Take the tarts out of the pans and cool them for an additional 15 minutes. Turn the tarts upside down, supporting the center with a piece of folded-up paper towel, for an additional 20 minutes or so if the bottoms are still moist and soft.
- Let the tarts finish cooling while you prepare the filling.
- Fill the tarts just before serving and garnish with your choice of toppings (whipped cream, sprinkles, chocolate chips, crushed cookies, candy pieces, etc.)
Enjoy and let me know what other filling combinations you try!
No comments:
Post a Comment